I am so excited to be auditioning for the role of Graphic 45 Brand Ambassador! Here is the tutorial I have created as part of my audition. I hope you will enjoy this.
Altered Brie Cheese Box Tutorial
You will need:


1 empty wooden brie cheese box (4.5″ diameter)
1 large sheet of medium wt. chip board, or a cereal or frozen pizza box
3-4 12″ x 12″ papers ( I used Once Upon a Springtime)
Embellishments: Lace, ribbon, flowers, beads, pearls, feathers, etc.
Glue (I prefer Aileene’s Tacky Glue)
Stirring stick or brush to spread glue
Sharp scissors, ruler, bone or other scoring tool
Paper cutter (optional)
1) Select your favorite papers to use for each element of the design. For the circles on top and interior of box and lid, you might like to use one of the motifs on the Once Upon a Springtime sheet. You’re also welcome to use any of the other papers in the collection, or a different collection entirely.
2) Cut a strip of medium chipboard that is 2.5″ wide by 14″ long. Or cut two pieces from the pizza box, one 12″ long and the other about 2.5″ to fill in the gap. Gently roll the card around your rolling pin or bottle, starting at one short end, to give the card some curve. Glue one long edge of card or chipboard to inner edge of box bottom, lining up the edge with bottom of box. You may need to trim one end off to make it fit.
Glue cardboard to inside of box bottom
3) Cut a strip of paper 12″ x 2.75″. Score at 1/4″ along one long side. Fold along the crease. Again, gently wind the paper around the rolling pin to curve it slightly without creasing, starting at the short end. Roll the paper strip around the rolling pin in small segments to avoid creases.
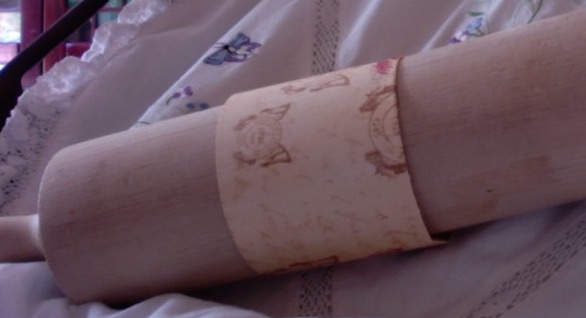
Roll cardboard and paper strips around pin
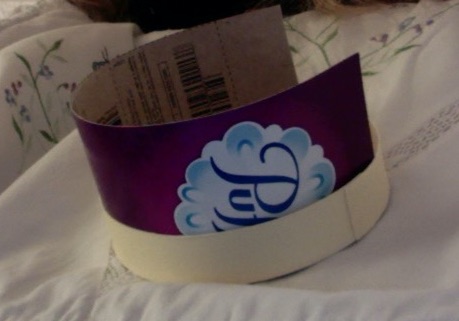
4) Apply glue to the outer side of the box, then adhere the strip of paper along the side, with the creased edge at the top. Make sure bottom edge of paper aligns with the bottom edge of box. Rub along inner wooden edge of the box with soft cloth to secure the paper. You will need to add another section to close up the gap between ends of the paper.

Glue paper to outside of box
5) Fold the creased edge to inside of box and glue down. Use a cloth or your score tool to press the paper to the inside.
6) Cut a circle of paper to fit the inside bottom of box, about 4.25″ diameter. I selected Mr. Mouse reading a book.

Cut a circle to fit inside bottom
7) Cut a 2.5″ x 12″ strip for inner side of box. Again, curl the paper slightly by winding the short edge around your rolling pin. Glue in to inside of box, carefully lining up the bottom edge of paper where the box bottom and side meet. If the paper sticks up above the rim of the box at all, carefully trim away the excess with sharp scissors. Add another section to close up the gap between ends of the paper, allowing a bit of overlap at each edge.

Paper for inner sides
8) Trace around the box lid and bottom, making templates on plain scrap paper. Trace circles onto your choice of papers to fit inside and outside of lid, and the outside of box bottom. Glue paper to outside of the lid. For this version, I chose to highlight one of the fairies on the main page. I used a motif of Peter Rabbit and his family on another version of the box. Use whatever suits your fancy.


9) Cut strip 1-3/16″ wide for lid sides, score along long edge at 7/8″. Gently roll around rolling pin to create a curve, then fold along crease. Apply glue to outside of lid side. Be sure that the pattern faces upright when the lid is in place before adhering. Carefully align the folded strip around outer side of lid, even with the edge. Smooth down. Then glue the folded flap to inside of lid. You will need to add another small bit to close the gap in the paper. Make sure it’s lined up in the same direction!


10) Cut another strip that is 12″ x 7/8″, and curl around your rolling pin. Glue to inside of lid, covering up the folded over edge.
11) Finally, cut a circle to cover outside bottom of the box, and glue in place.

Circle for box bottom
12) Embellish the box to your heart’s content with lace, ribbon, flowers, beads, or fussy-cut elements. This is the first example I made. I used a narrow lace around the outer edge of the lid, and a few flowers from my stash. Have fun!

Thank you so much for reading my tutorial! If you try this out and want to let me know how it goes, I would love to get your comments.

The instructions are very clear and easy to understand. I would love to try making this box so I will try to find the brie box you used or another circular box. I thought I had a circular box and it turned out that I had already used it for a project. I think it’s an absolutely beautiful project. I am keeping my fingers crossed for you, Quadira!!
LikeLike
Thank you, Leah! You could use any round box, if you’re good at altering the measurements to fit. It’s actually pretty easy to just measure around the box! I look forward to seeing your version.
LikeLike
I love it Quadira! Good luck!
LikeLike
Thank you, Sandi!
LikeLike