My Year of Wild Art: Day Eighty-Four

I created another little tutorial today; this time I’m just sharing the photos and steps here, rather than on video. EnJoy!


Tea Bag Charm Tutorial


You will need:


• Two empty and rinsed tea bags
• Scraps of your favorite paper
• Ribbons, lace, pearls, or other embellishments of choice
• Scissors
• Ruler
• Pencil
• Your Favorite Glue (I used Aleene’s Tacky and E6000)
• Clean chopstick
•

Tea Bag Charm Tutorial 1

Step One: First, cut the longer edges of your tea bags straight across, and dump out the leaves. Rinse the bags, turning while they are wet to rinse off remaining residue. Use the tip of a chopstick to gently turn the corners. Turn right side out again when clean, and hang to dry. Then press flat with a hot iron. They don’t have to be perfect!


Tea Bag Charm Tutorial 2

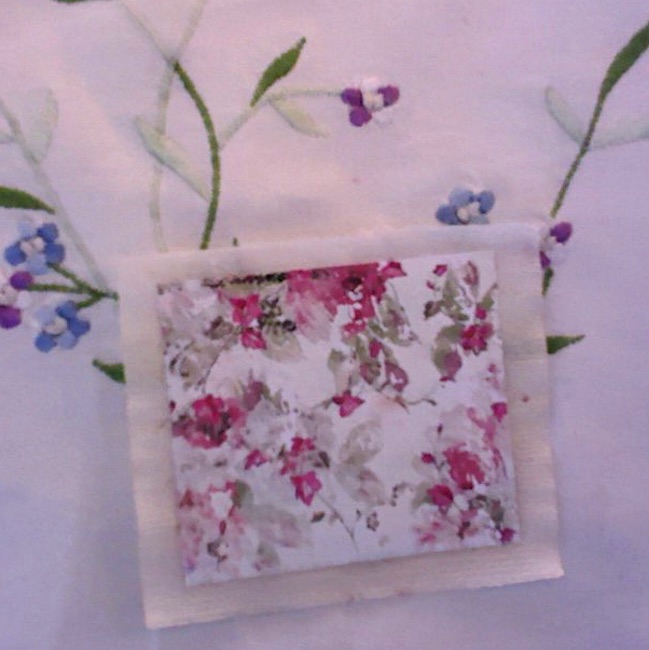
Step Two: Select a snippet of paper to decorate your charm. It can be a square or any shape you desire, even a sticker if you prefer. Decide where you want to place the paper, and glue in place onto one of the tea bags.

Tea Bag Charm Tutorial 3

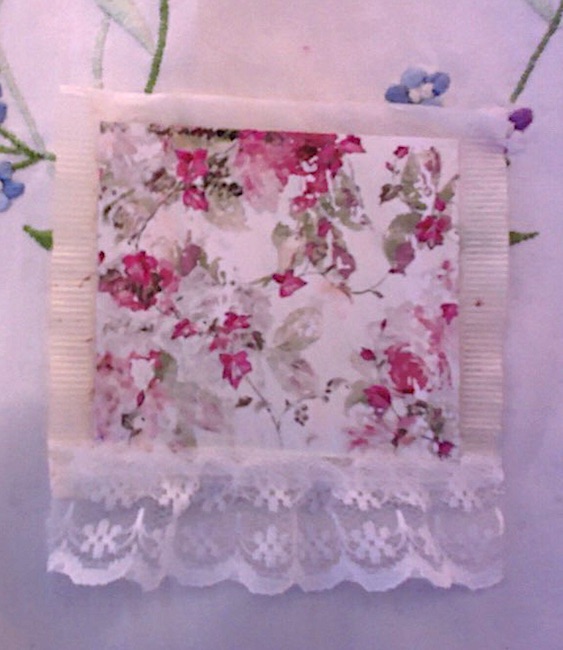
Step Three: Begin embellishing as you wish. Here I added a length of pretty lace…

Tea Bag Charm Tutorial 4

…and some lovely flat-back pearls. Oops, I did not get them evenly spaced! Oh, well this gives it more appeal

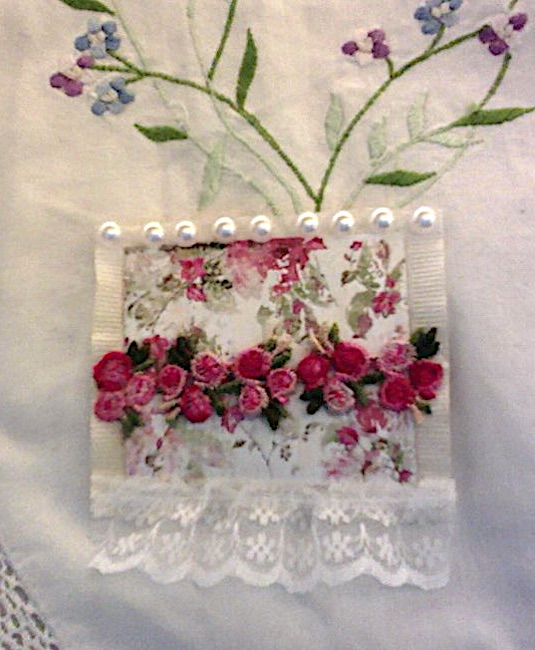
Tea Bag Charm Tutorial 5

Next, I added a length of rose clusters to form a belly band. I discovered that the tacky glue does not work well with the lace and rose trim, as the glue soaks into the tea bag pretty quickly. So I adhered these with E6000.

Tea Bag Charm Tutorial 6

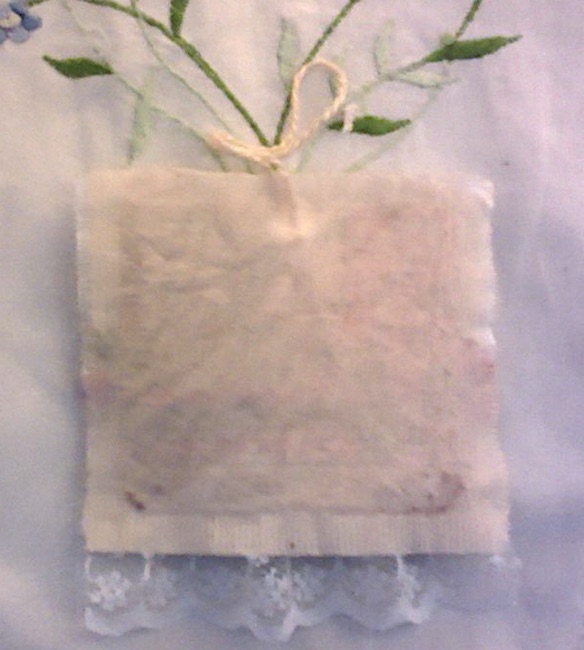
Step Four: On the reverse side, apply a bit of glue to hold a loop of perl embroider thread, ribbon, or hanging of your choice. Tie a knot above the cut ends of the loop and lay those over the glue. Then spread tacky glue over the rest of the tea bag, and carefully apply the second bag, lining up the edges as best you can (I had to trim one edge when done). This second tea bag adds firmness and durability to the charm. You may also choose to decorate the reverse side if you wish.

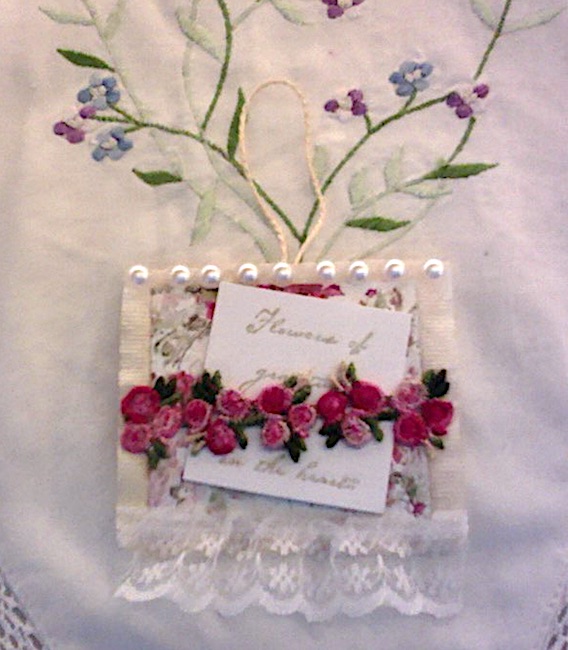
Tea Bag Charm Tutorial 7

Step Five: Add a tag inside the belly band, or a card if you wish. You could also create a pocket intead, or neither. Add stamps, beads, buttons, or whatever else you love. You can hang your charm as an ornament, or use it in a journal as a dangle charm or even a small bookmark.

Have fun creating! I hope you enjoyed this tutorial. Do let me know if you try it out, please.

My Year of Wild Art: Day Eighty-Three

Oooh, I am in love with today’s creation! I took a plain envelope and covered it with pretty papers, then cut the sides open and turned it into a journal. I sewed the journal right to the fold in the envelope, and closed the flap with a magnet. Soooo gorgeous! The journal measures 8.75″ x 5.75″ and has fourteen pages to write or draw on, plenty of space for your poems, dreams, wishes, prayers or whatever you desire.  EnJoy!

My Year of Wild Art: Day Eighty-Two

I made a tutorial for the tea bag journal today! What an undertaking! Making and taking photos that I then edited, added to Keynote to make slides, and wrote in the steps. Finally got that all done, then exported to movies, and uploaded to YouTube. PHEW! Now I know why I don’t make more tutorials, too much work! Though I may make one more and just post the photos and instructions in a blog post, rather than making a video.

Here is the link to the tutorial; I hope you enjoy it! If you decide to try this out, please do let me know in the comments and send me a link to your own video or photos, if you wish. You can email me here: Quadira@fairyfiberfancies.com

Tea Bag Journal Tutorial


My Year of Wild Art: Day Eighty-One

Today was almost hot! Sunny and dry, lovely and I still yearn for more rain. I pray for a cool, wet summer for a change, with no fires anywhere!

This afternoon I covered two more oatmeal cannisters with pages from some Victoriana calendars I have; these hold two rolls of TP and pretty up my laundry closet! I added photos of two that I decorated a couple of years ago, as well. Numbers 3 and 4 made today. EnJoy!

Reminder: I’m running my YouTube subscriber challenge until May 30th, so you have just 2 weeks left to participate. Learn all about it on this video!

My Year of Wild Art: Day Eighty

Today I played around with decorating empty pen barrels to re-use in projects; more on those another day. Then I made this pretty waterfall journal, inspired by Natasa of Treasure Books.

It would be better if all the pages were double-sided, as there is too much white on the right-hand pages. I’ll have to do lots of embellishing! Have a Joyful weekend!

Waterfall Journal (in Progress)

My Year of Wild Art: Day Seventy-Nine

Got my teeth cleaned today; the hygienist said that my teeth didn’t have too much tartar, good! So that’s done for the year. Phew! So car, teeth, and body are all in good working order. Yay! 🙂

Went to the library and stocked up on books today, always a good feeling. This evening I went for a walk with a friend, and after dinner I made this pretty Christmas tag that has lines for writing on the back. I used another panel from an almond drink carton, and Stamperia’s “Classic Christmas” paper. EnJoy!

My Year of Wild Art: Day Seventy-Eight

Sometimes it takes me all day to figure out what to create–and today was one of those days! Sadly, I missed the best light in the studio, so had to create with artificial light.

I made this sweet little journal using more of the papers I recently won from a YouTube hop; I printed these out on cardstock and trimmed the borders. I love that each printed page has a blank reverse side, leaving plenty of room to write or draw. I embellished some of the pages with elements from the Le Romantique papers made by
Graphic 45; I think these go splendidly with the main papers. EnJoy!

My Year of Wild Art: Day Seventy-Six

Chilly today and a bit more rain! I love it! My car is Still in the shop; I expect to retrieve it tomorrow morning. Phew! Should be good for many more miles now, thankfully.

This evening I made this sweet tiny journal using rinsed and ironed tea bags for the pages! I’ve been thinking about doing this for ages, finally got down to it. The cover is a scrap from the Stamperia “Hortensia” papers. I sewed the binding with my sewing machine, right along the edge of the spine.

I tested out several writing implements: gel pen, marker, and a B8 pencil show up the best on the tea bags. Ball point pens, not so much. EnJoy!

Reminder: I’m running my YouTube subscriber challenge until May 30th, so you have just 2 weeks left to participate. Learn all about it on this video!


My Year of Wild Art: Day Seventy-Five

We got a little more rain this evening, then hail and sun and more rain. We love the moisture!

Last week I won a set of digital papers from a video hop hosted by my good friend, Sandi Nagel! I printed them out today and made this sweet little tag, using a panel from an almond milk carton as the base. One of the tea bag charms I made some days ago goes perfectly in the little pocket, along with the “Paris” tag. So pretty. EnJoy!